Ever thought of making your Minecraft world your own? Creating a Minecraft server is a great way to do it! This easy guide will show you how to make a Minecraft server. It’s perfect for beginners and experienced players alike.
We’ll cover everything from the basics to choosing the right hosting. Our guide will make setting up your Minecraft server easy and fun. So, get ready to start your own Minecraft adventure!
Key Takeaways
- Learn the fundamentals of what a Minecraft server is.
- Discover the benefits of creating your own server.
- Understand different server types and hosting options.
- Follow a clear, step-by-step Minecraft server setup guide.
- Find out how to engage and build a community around your server.
Understanding Minecraft Server Basics
To understand what a Minecraft server is, you need to know its role in gaming. It lets players join multiplayer games with friends or others online. You can choose servers based on what you want, like vanilla or modded games.
What is a Minecraft server?
A Minecraft server is a place where players can play together. There are many types of servers, each for different play styles. Some common ones are:
- Vanilla servers: These offer the game as Mojang designed it.
- Modded servers: These add new features or changes to the game.
- Survival servers: These focus on survival, like gathering resources and crafting.
- Creative servers: These let players build freely, focusing on creativity.
Why create your own server?
There are many reasons to make your own Minecraft server. It lets you control the game settings for a custom experience. The main benefits are:
- You can set up gameplay the way you like it.
- You can make unique rules and settings for your community.
- It’s a great way to connect with friends in a special space.
Setting up a server lets you dive into Minecraft’s details. It offers flexibility and a personal touch in the gaming community.
Related Post: Minecraft Bedrock Edition (2011) Game Icons Banners
Minecraft Server
Starting a Minecraft server needs a solid plan. This guide offers a step-by-step guide to make it easier. Knowing the different server types for Minecraft helps you create a server that fits your gaming style. Whether you like survival, creative, or adventure modes, there’s a type for you.
Step-by-step overview
To set up your Minecraft server, follow these steps:
- Determine your goals for the server.
- Choose the right software for your needs.
- Install the server software on your machine.
- Configure the server settings using the configuration files.
- Start the server and connect to it with Minecraft.
Choosing the server type
When looking at server types for Minecraft, consider these options:
- Survival servers: Focus on gathering resources and crafting.
- Creative servers: Offer unlimited resources for building without limits.
- Adventure servers: Provide custom maps and quests for exploration.
Related Post: Exploring the World of Minecraft (2009) Game Icons and Banners
Choosing the Right Hosting Option
When you set up a Minecraft server, picking the right hosting is key. You can choose between hosting it yourself or using third-party services. Each choice affects how well your server runs, how easy it is to manage, and what it costs.
Self-hosted vs. third-party hosting
Hosting your server yourself means you have full control. You can tweak settings just how you like them. But, it requires a lot of tech know-how and can stress your computer and internet.
Third-party hosting, on the other hand, offers reliability and support. It’s easy to use, thanks to pre-set server options. But, it might cost you money each month, depending on the provider. Knowing these points is crucial when picking a hosting service.
Top Minecraft server hosting providers
Looking for the best hosting? Think about server speed, how it grows, support, and your budget. Below is a list of top providers:
| Provider | Key Features | Price Range |
| Aternos | Free hosting, easy to set up, supports mods | Free |
| HostHorde | Unlimited slots, DDoS protection, 24/7 support | $5/month |
| Apex Hosting | Instant setup, one-click modpack installer, 24/7 support | $5/month |
Step-by-Step Minecraft Server Setup
Setting up a Minecraft server is a fun way to make the game your own. It involves several steps, like installing software, setting up server properties, and launching it for others to join. Each step is important for a great gaming experience.
Installing Minecraft server software
First, download the Minecraft server software from the official Minecraft website. Make sure it matches your game version. Save the file in a folder on your computer for organization. Running it for the first time will create files like eula.txt. You must edit this file to agree to the license agreement.
Configuring server properties
Next, you’ll configure your server. This is where you make your server your own. Open the server.properties file in a text editor. Here, you can change settings like game mode, difficulty, and player limits. This minecraft server configuration tutorial will help you customize these settings.
- gamemode: Pick between survival, creative, or adventure modes.
- difficulty: Choose the difficulty level from peaceful to hard.
- max-players: Set a limit on how many players can join.
Launching your server
Now, it’s time to launch your server. Go back to the folder and run the server file. A window will open showing your server is live. You might need to change your router settings to let others connect. You can share your server IP or use a dynamic DNS service to help friends join.
By following these steps, you’ll set up a Minecraft server successfully. Start building your own gaming community!
| Step | Description |
| 1 | Download and install the Minecraft server software. |
| 2 | Modify the eula.txt file to accept the terms. |
| 3 | Edit the server.properties file to configure your server settings. |
| 4 | Launch your server and configure router settings if necessary. |
Best Practices for Minecraft Server Management
Managing a Minecraft server well is key for a great player experience. To keep your server running smoothly, follow some important steps. These include keeping everything updated, doing regular maintenance, and managing player permissions wisely.
Regular updates and maintenance
Keeping your server’s software and plugins up-to-date is crucial. Regular updates improve your server’s performance and keep it secure. If you don’t update, your server could become vulnerable to attacks, putting player data at risk.
- Schedule frequent updates for server software and plugins.
- Backup data regularly to prevent loss.
- Monitor server performance metrics and address issues promptly.
Managing player permissions
Managing player permissions is also vital. By setting clear roles and privileges, you make the game safer and more fun. It helps keep the game environment clean and ensures everyone knows their place.
- Define roles such as Admin, Moderator, and Player.
- Utilize plugins that simplify permission management.
- Conduct regular reviews of player roles to adapt to changes in your community.
Securing Your Minecraft Server
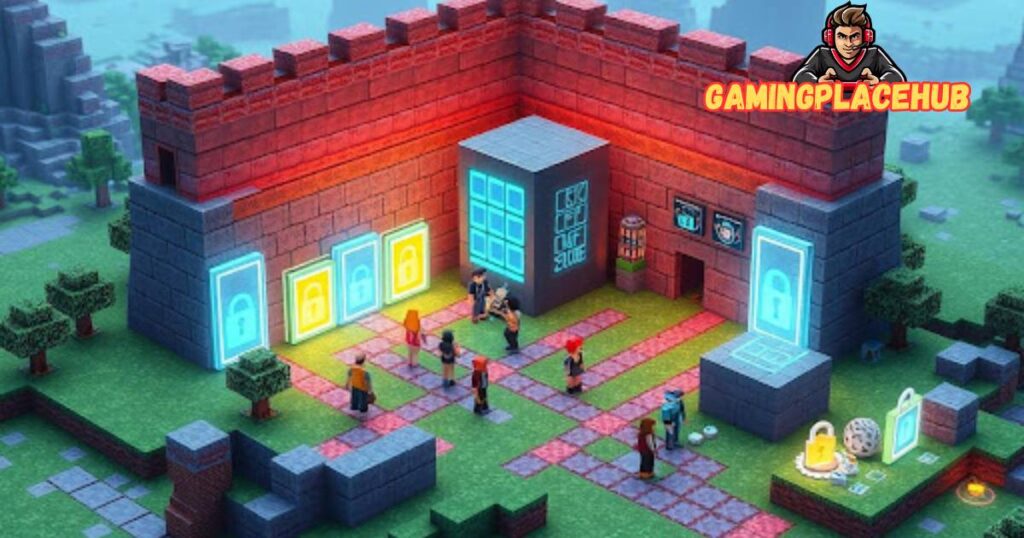
Setting up a secure Minecraft server is key to a safe gaming space. Using strong firewalls and player whitelists can block unauthorized access. Keeping your security settings up to date is also vital.
Implementing security measures
Here are some ways to make your Minecraft server more secure:
- Firewall Setup: Firewalls help control who can connect to your server by only allowing trusted IP addresses.
- Whitelist Players: Only let players on your whitelist join your server. This keeps out unwanted visitors.
- Secure Server Files: Protect your server files from unauthorized changes. Also, have backups to recover lost data.
- Enable 2FA: Two-factor authentication adds an extra security step by requiring a second verification besides a password.
Choosing effective plugins for protection
Using the right plugins can add extra security to your server. Here are some good options:
| Plugin | Purpose | Benefits |
| EssentialsX | Player management | It offers tools to manage user permissions and keep your server tidy. |
| LuckPerms | Permissions management | It provides advanced permission handling for detailed control over user access. |
| CoreProtect | Block logging | It lets you track player changes, making it easy to undo unwanted edits. |
| SimpleClans | Clan management | It helps secure your player groups and manage clan activities smoothly. |
Optimizing Minecraft Server Performance
Keeping your Minecraft server running smoothly is key to a great gaming experience. By using different strategies, you can make your gameplay better. This part will cover how to tweak server settings and keep an eye on its health to fix any problems.
Adjusting server settings for efficiency
Changing your server settings is important for better performance. Here are some tips:
- RAM Allocation: Give your server enough RAM, based on how many players you have and what they’re doing. More RAM means less lag.
- Player Limits: Don’t let too many players on at once. Too many can slow things down.
- Chunk Loading: Make chunk loading settings better for smoother play. This means less work for your server.
- Plugins: Pick plugins that don’t use too much resources. Light plugins can really help your server.
Monitoring and troubleshooting performance issues
Watching your server closely helps you find and fix problems fast. Use tools to check on your server’s health, like:
- CPU Usage: Keep an eye on CPU use to avoid crashes.
- Memory Usage: Watch memory use all the time. High use might mean you need more resources or tweaks.
- Tick Rate: Check tick rates to make sure your server is running well. Big changes in tick rate can mean trouble.
Using these tips helps you stay ahead of problems. This makes your gaming time more fun. Below is a table with common issues and how to fix them.
| Issue | Observation Method | Solution |
| Lag spikes | Monitor latency through server tools | Adjust player limits and consider upgrading hardware |
| Crash during peak hours | Review error logs | Upgrade server resources or optimize plugins |
| Slow loading times | Analyze server performance metrics | Increase RAM allocation and reduce unnecessary plugins |
Related Post: minecraft jenny mod
Building a Community Around Your Server
Engaging with players is crucial for a thriving Minecraft server. A dedicated community boosts player retention and satisfaction. It’s vital to focus on interaction and connection.
Engaging with players
To build strong relationships, try these strategies:
- Regularly communicate through in-game messages or forums.
- Solicit feedback from players about gameplay experiences and server features.
- Encourage players to share their experiences and stories.
These steps help create a Minecraft server community that’s inclusive and lively.
Creating events and activities
Events are great for bringing players together. Here are some ideas:
- Host themed gameplay nights, such as survival challenges or creative build-offs.
- Organize contests, rewarding players for outstanding builds, achievements, or creative gameplay.
- Celebrate in-game holidays or milestones with special activities.
Engaging in these events strengthens players’ connection to the server. It also makes their experience more enjoyable. A united community keeps players coming back, keeping their interest alive.
| Event Type | Description | Frequency |
| Themed Gameplay Nights | Players join in a specific theme or challenge, like Skyblock or Hardcore. | Weekly |
| Build-Off Contests | Players create builds based on given themes, judged for creativity. | Monthly |
| Seasonal Events | Special events to celebrate in-game holidays such as Halloween or Christmas. | Seasonal |
Top Tips for Running a Successful Minecraft Server
To keep your Minecraft server alive and kicking, you need solid strategies. Start by gathering player feedback to make the game better and grow your community. Talking to your players can give you great ideas to improve your server.
Gathering feedback from players
Player feedback is crucial for your server’s success. Here are ways to get their opinions:
- Do regular surveys or polls on forums and Discord.
- Start open discussions on feedback systems in your server.
- Keep an eye on game chat for player comments.
By using these methods, you can find out what players like and fix any problems. This is key to running a successful Minecraft server.
Promoting your server effectively
To bring in new players, you need to promote your server well. Here are some tips for promoting your minecraft server:
- Use social media like Twitter, Instagram, and Facebook for updates.
- Join Minecraft communities on Reddit and forums.
- Show off your server’s cool features on YouTube or Twitch.
Hosting special events or limited-time offers can create buzz and attract new players. Using these strategies can really help you reach more people and grow your player base.
FAQ
What are the best practices for creating a Minecraft server?
Choosing the right server type is key. Make sure it’s properly configured and secure. Update the server software regularly. Managing player permissions and engaging with your community are also crucial.
How do I troubleshoot Minecraft server issues?
Start by checking server logs for errors. Ensure your hardware meets game requirements. Monitor performance and adjust settings as needed. Restarting the server and updating plugins can often solve problems.
What hosting options are available for a Minecraft server?
You can host on your computer for full control, but you’ll need good hardware. Alternatively, third-party providers like Aternos, Apex Hosting, or HostHorde offer support and features.
What is a Minecraft server and how does it work?
A Minecraft server lets players connect and play together. It manages game data and player communications. It keeps the game environment running smoothly, whether vanilla or modded.
How do I ensure a secure Minecraft server setup?
Use a firewall and set up whitelists for security. Regularly update your server software. Plugins like EssentialsX and LuckPerms help manage permissions and protect against unauthorized access.
What are the top tips for running a Minecraft server?
Engage with your players and listen to their feedback. Promote your server on social media and gaming forums. Hosting events or contests keeps the community active and connected.
Can I create a custom Minecraft server?
Yes, you can create a custom server. Choose your server type and install mods or plugins. Configure settings to match your gameplay style for a unique experience.
How can I optimize my Minecraft server performance?
To improve performance, adjust server settings like RAM and player limits. Use efficient plugins. Regular monitoring helps identify and fix performance issues.
Conclusion
Starting a Minecraft server is exciting. Success comes from knowing how to manage it well. This guide will help you create a place where players can have fun and work together.
Choose the right hosting and setup for your server. Make sure it runs smoothly and is safe. This will make playing Minecraft a great experience for everyone.
Listen to what your players say and talk to them often. This will make your server better and happier. Keep your server up to date and manage it well for long-term success.
Whether you’re new or want to improve your server, this guide has what you need. Start now, try new things, and enjoy making your Minecraft server a reality!
Read More: how to make a saddle in minecraft
Read More: how to make paper in minecraft
Read More: how to make smooth stone in minecraft
Read More: how to transfer playerdata from world minecraft server
Read More: how to equip trial mask minecraft
Read More: how to remove java array error minecraft
What i dont understood is in reality how youre now not really a lot more smartlyfavored than you might be now Youre very intelligent You understand therefore significantly in terms of this topic produced me personally believe it from a lot of numerous angles Its like women and men are not interested except it is one thing to accomplish with Woman gaga Your own stuffs outstanding Always care for it up